MyTona company shared with App2Top.ru experience working on locations for games in the hidden genre on the example of her blockbuster Seekers Notes.
The material was prepared by the CPO of the company Valeria Gorokhova.

Valeria Gorokhova
I have prepared a case using the example of the location “Autumn House” from the update number 1.33.
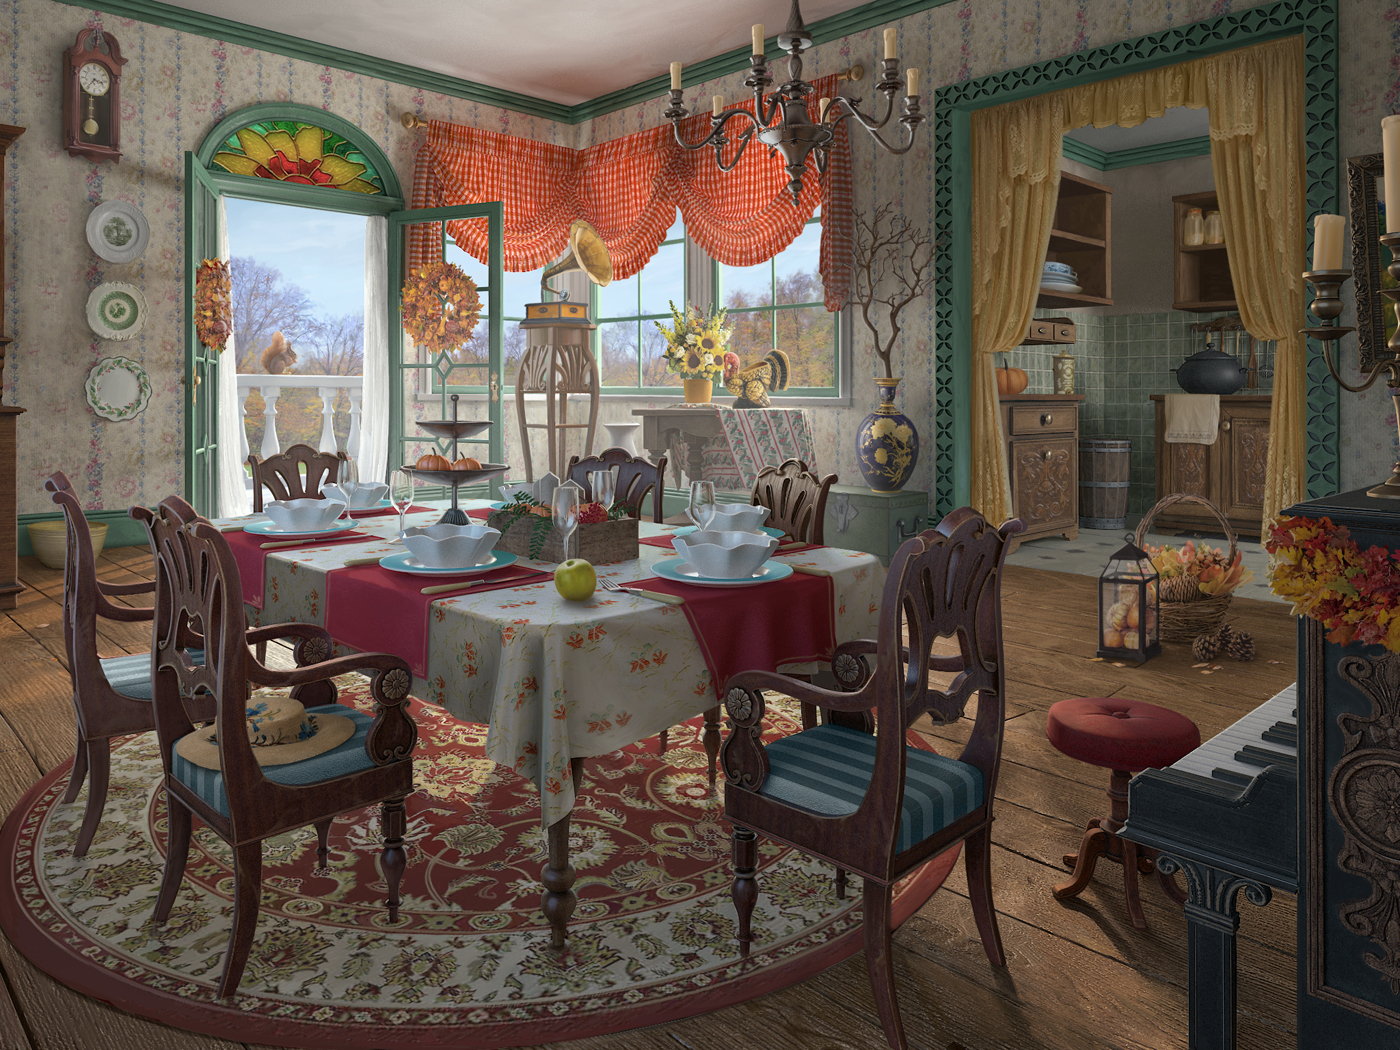
Location “Autumn House”
Location path from idea to release
In Seekers Notes, there are more than 60 locations that differ in detailed drawing. The player does not just see a beautiful scene, but plunges into a special atmosphere and thereby gets maximum pleasure from the gameplay.
Important: all graphics for MyTona games are created within the walls of the company without the involvement of third-party specialists.
In this article, we will analyze in detail the stages of creating hidden locations. Conditionally , the development can be divided into several important stages:
- idea;
- collecting references;
- location sketch;
- 3D modeling;
- 2D processing;
- animation of locations;
- objectification;
- implementation of the location.
1. The idea
The introduction of any location into the game has a number of rules.
First, content game designers discuss possible options for new backgrounds with screenwriters and an art lead. The main rule is that the scenes should not be repeated and must correspond to the setting of the game.
Ideas of possible locations are generated according to the theme of the event. There are mandatory holiday updates that we cannot ignore, for example, Halloween, Christmas, Chinese New Year, Hanami (festival of cherry blossoms and admiring in Japan) and so on.
If no global holidays are planned, then you can let your imagination run wild and open up new mysterious corners of Darkwood to players or create a location closely related to the time of year.
2. Collecting references
As soon as the idea of the location is determined, references are prepared for it. A special document is being created, which outlines the idea of what the future location will look like. The document contains a lot of visual for artists and brief comments: what details are worth paying attention to, what to be inspired by and what atmosphere to recreate.
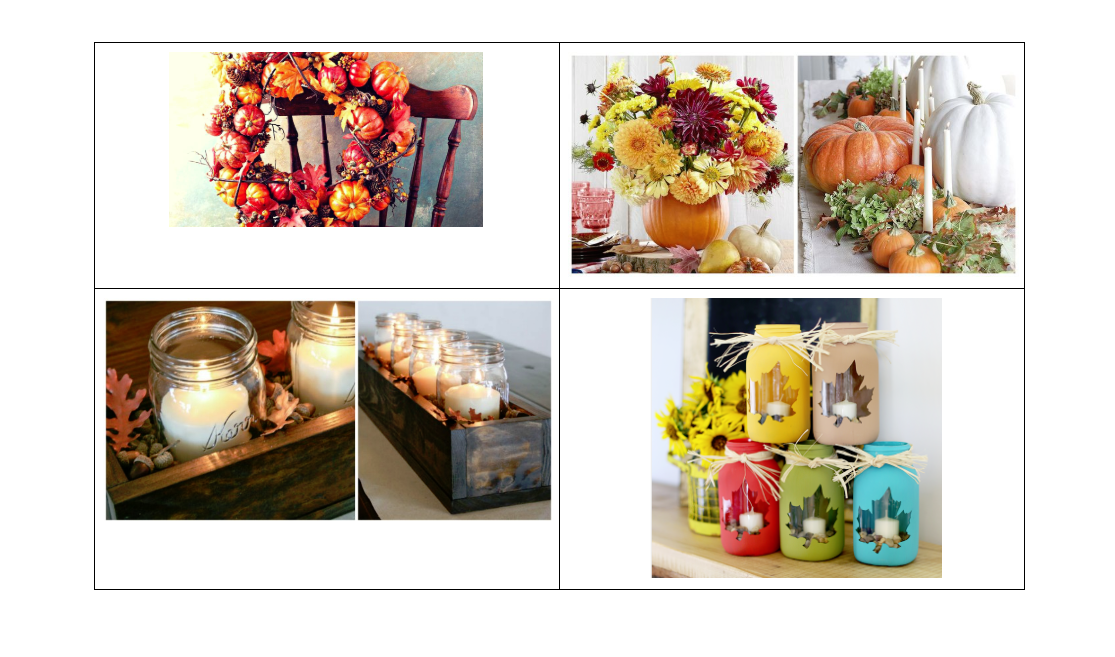
References of the future location “Autumn House”
3. Location sketch
Based on the references, the artists perform several rough sketches of the future location. Then the most visually and functionally advantageous one is selected from these options. The choice takes into account: assessment of composition, angle and compliance with planning.
This is followed by the elaboration of the approved option: adding details, approximate lighting and aerial perspective, as well as the future animation is thought out in advance. The sketch stage gives a clearer idea of what the final result should be, and also simplifies the work in 3D modeling.
The final version of the sketch remains in black and white. A 3D artist will then work with the color together with an art lead.

Sketch of the location “Autumn House”
4. 3D modeling
After the sketch, the location is sent to a 3D artist who will translate the sketch into a three-dimensional scene. The basic architectural rules are observed in the modeling. The sizes of objects in the scene are scaled relative to the actual size.
In the sketch, the 2D artist sets the basic shapes without detailing. The 3D artist works through every detail. He works independently, for example, on stucco patterns and on wooden objects, on a pattern on wallpaper and on many other things. These nuances require careful study of the style of the era in which the setting of the game is sustained. The details convey the atmosphere and the spirit of the time.
All scenes are assembled in 3ds Max. The rendering of the location is performed using the V-Ray visualization plugin. The GrowFX plugin is used for modeling and animating plants. Plants in the exterior and interior are modeled exclusively in the form of a sketch, since the trunk and branches can play the role of guiding lines in the composition.
When texturing, the Substance Painter program is used. The program makes it possible to carefully work out small details. For example, to make them look more shabby, antique. Such nuances as a dusty mirror or a spider’s web can make it clear to the player that no one has been in the location for a long time, and they also add realism to the objects.
There are sculptures of animals and people in the scenes, which help to give more atmosphere. For such purposes, the ZBrush program is used.
After constructing the entire location, Aerial Perspective special effects are used, with which the artist adds the final touches to the image.
Then a render is done in a few passes. Here the atmosphere layer, RGB, WireColor and ExtraTex, which the artist works with, are displayed separately.
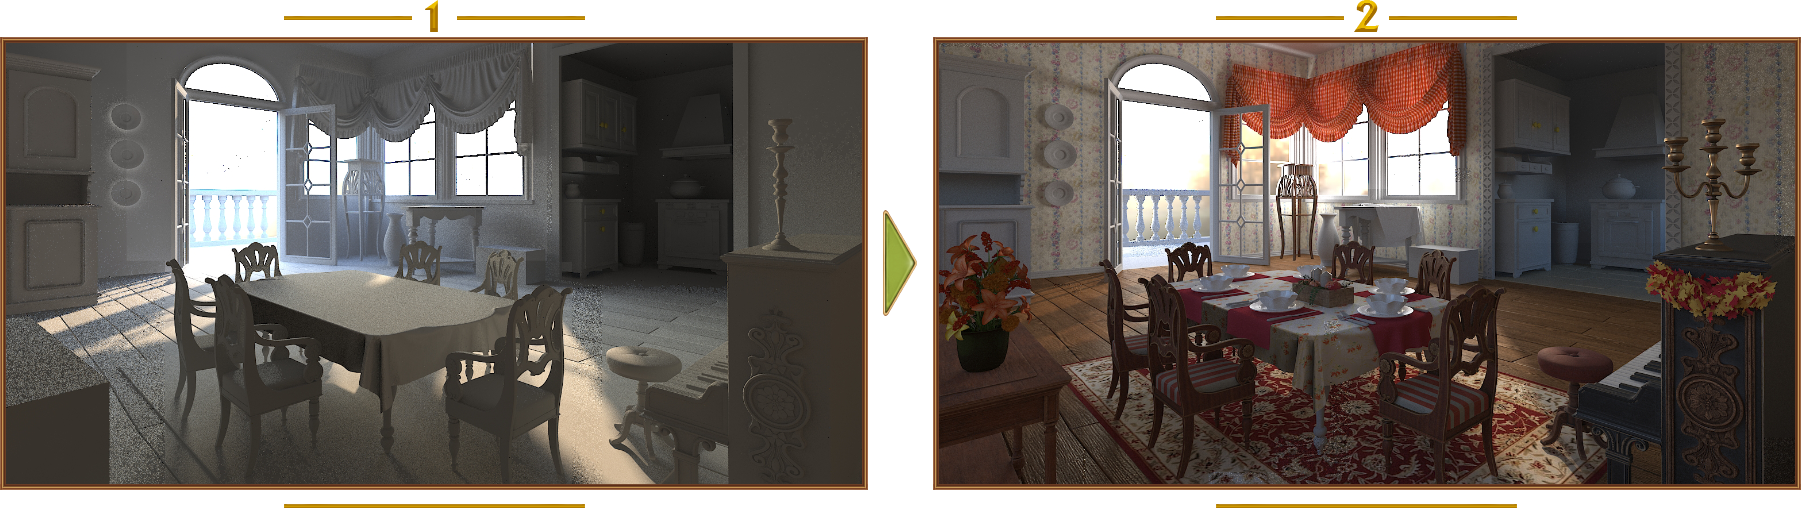
The process of 3D processing of the “Autumn House”
5. 2D processing (overlay)
After the 3D stage, the location is sent for 2D processing (overlay). At this stage, textures are carefully worked out, an airy perspective and smoothness appear in the locations, objects and objects going into the distance become less saturated and bulky. The location becomes more natural, natural. Here you can also animate the scene with the help of various details. A carelessly lying handkerchief, an abandoned newspaper, steaming coffee are important little things that work for the atmosphere.
The rules for 2D processing are similar to the canons of conventional drawing. For example, the farther away the location objects are, the lighter and faded they are. And vice versa: the closer the objects are to the viewer, the richer and more contrasting their color becomes.
It is necessary to try to avoid absolutely black and white colors in the art (with the exception of only the brightest glare or light source), as well as dark areas in the location: all corners should be clearly visible in low-brightness conditions of the screen. 3D objects in scenes can sometimes look unnatural, so such objects need to be corrected in 2D or try to modify with mattepaint (using photos).
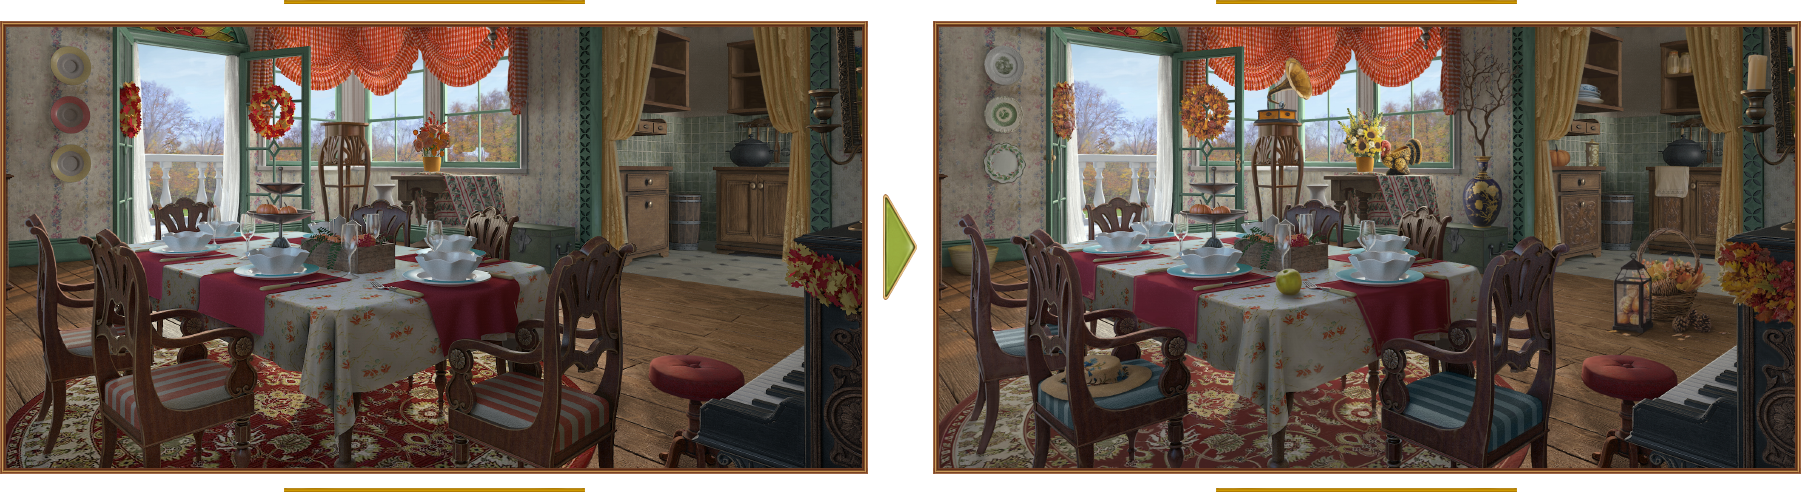
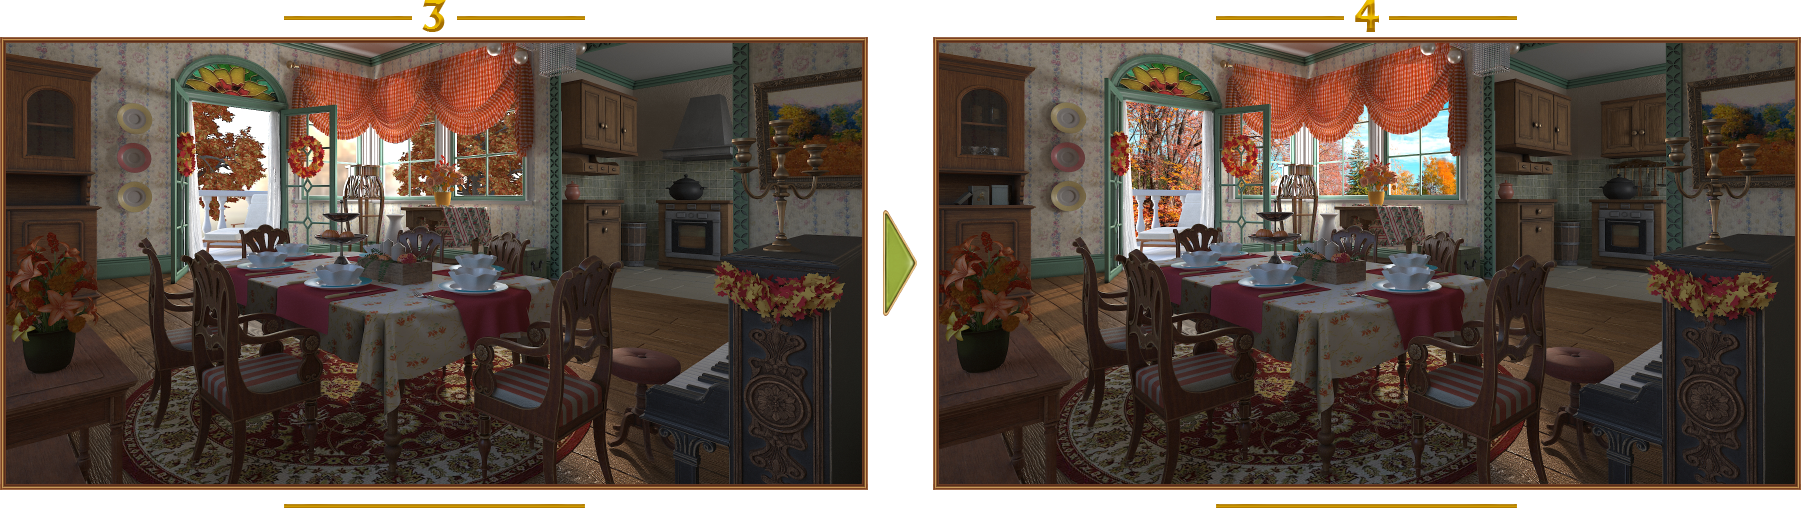
Before and after 2D processing of the “Autumn House”
6. Animation of locations
Next, the location goes through an animation stage. It is worth remembering here that the animation should not be overloaded. Its main goal is to revive the location, to make the player not just look at the picture, but immerse himself in the special atmosphere of this location. The simplest examples of animating a scene with animation are particles of dust, snow, rain, leaves and software animations for changing the degree of transparency, for example, for animating the rays of the sun from a window.
The process of work begins with the fact that artists prepare all the art for animation and transfer it to animators or programmers. When creating an animation, one should take into account the rule: the animation layer should not overlap hidden objects. However, translucent effects can be positioned above all layers and cover objects; they will still be picked up by the player’s tap.
It is also worth considering the power of the devices. For weak devices, it makes sense to remove them altogether, and for some, simply reduce their number.
We practice four types of animation in our work:
- animation in Spine (it creates animation of objects, characters and most effects);
- animation of particulars (created in our own MParticle environment);
- frame—by-frame animation (as a rule, this is a complex animation that involves the rotation of an object around its axis or complex mechanisms – created by 3D artists and then rendered frame-by-frame);
- software animation (this is how the simplest effects and movements are animated, such as the glow of lamps or the light swaying of objects).
7. Objectification
After the animation is completed, the objectification stage begins. Simply put, artists hide hidden objects, which the player will subsequently search for. It also has its own rules. For example, hidden objects cannot be repeated with the content filling the scene itself. Also, it should always be remembered that the visible part of the object should identify the object well. For example, if we draw a hollow on a tree and put a squirrel object inside, then you cannot draw a squirrel in a hollow so that only its tail is visible. This will be unfair to the player, because it will be impossible to determine 100% by the tail that it is the squirrel hidden there.
From other nuances, it can also be noted that in our game there are several modes of searching for objects and this also imposes its own restrictions and rules. For example, if there are both a ball and a watermelon in the location, then in the “Silhouettes” mode their outlines may turn out to be exactly the same, which cannot be allowed.
When objectifying, difficulties may also arise due to the difference in screen resolutions. The minimum size of hidden objects for the iPad retina display should be approximately 80-100px, and for a regular display, the minimum size will be twice as small. If you make the object smaller, the player will not be able to recognize the object while playing on a smartphone.
Also, some difficulties may occur when tapping on the object. For retina displays, the size of the tap zone increases to 150px, and for no-retina displays – 75px. If you neglect these parameters and make the size of the tap zone smaller, then the tap on the subject will be poorly registered by the device, which will lead to player discomfort.

Objectification: the room is filled with hidden objects
In Seekers Notes, the same hidden items can have multiple positions in the same location. The player will not get bored playing the same location, even if the items are repeated from time to time, because they are always hidden in different places.
8. Implementation and testing of the location
What awaits the location after the objectification? The stage of the finish line is coming — the introduction of the location into the game.
For high-quality and fast implementation of locations, our programmers have developed useful tools for themselves and artists (including a plugin for Adobe Photoshop). Therefore, the implementation and testing takes place quite quickly.
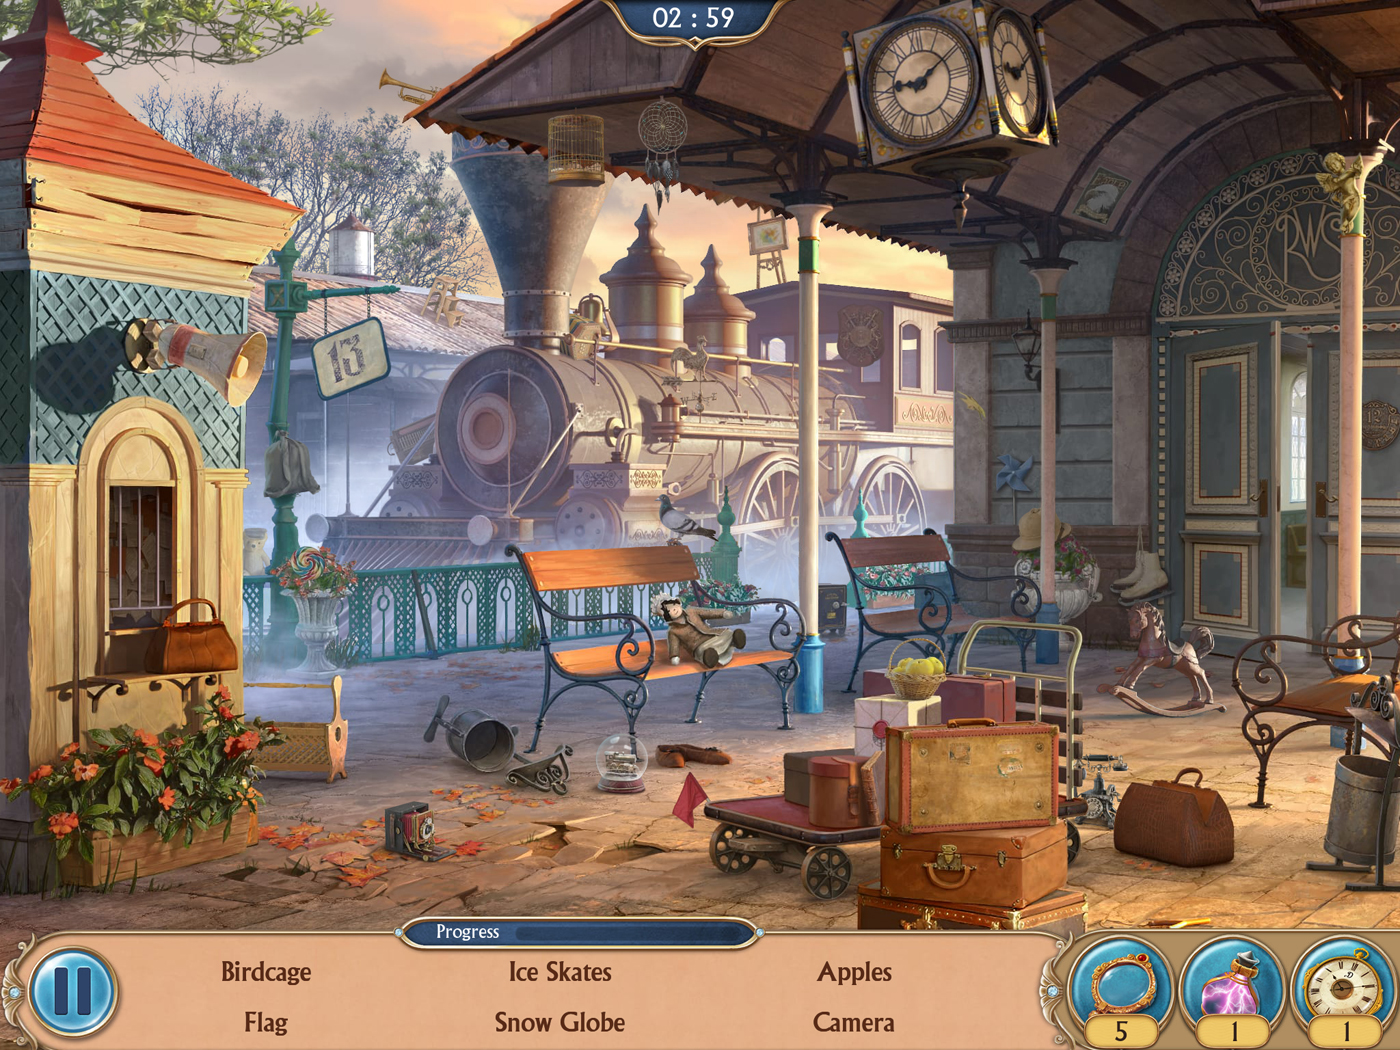
One of the first locations in the game is the “Station”
Whether players like the location or not depends on many factors. The results of the surveys showed that mostly players prefer bright atmospheric locations with interesting animation.
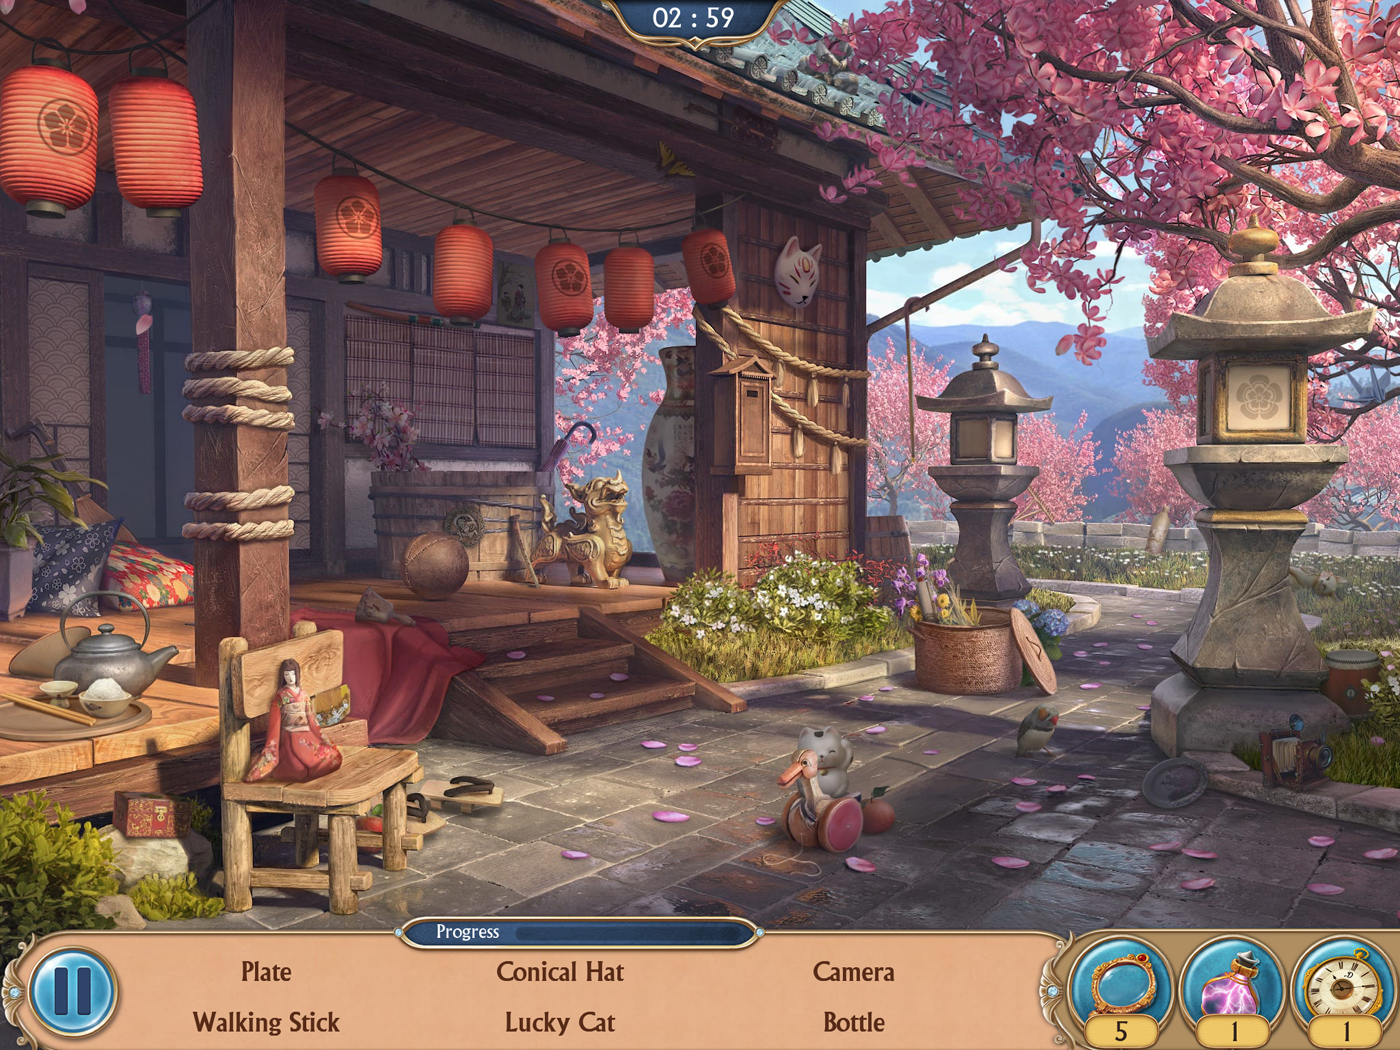
Location “Sakura Garden”
For example, a survey conducted in the game’s fan group in social networks showed that the locations “Mayor’s Office”, “Station”, “Atelier”, “Sakura Garden”, “Children’s Courtyard”, “Perfumery” and “Laboratory” are particularly liked. But objectification also plays an important role. In the location “Confectionery” there are very small objects that are hidden too well, and although the scene itself is virtuoso in its execution, players do not really like it precisely because of the high complexity.
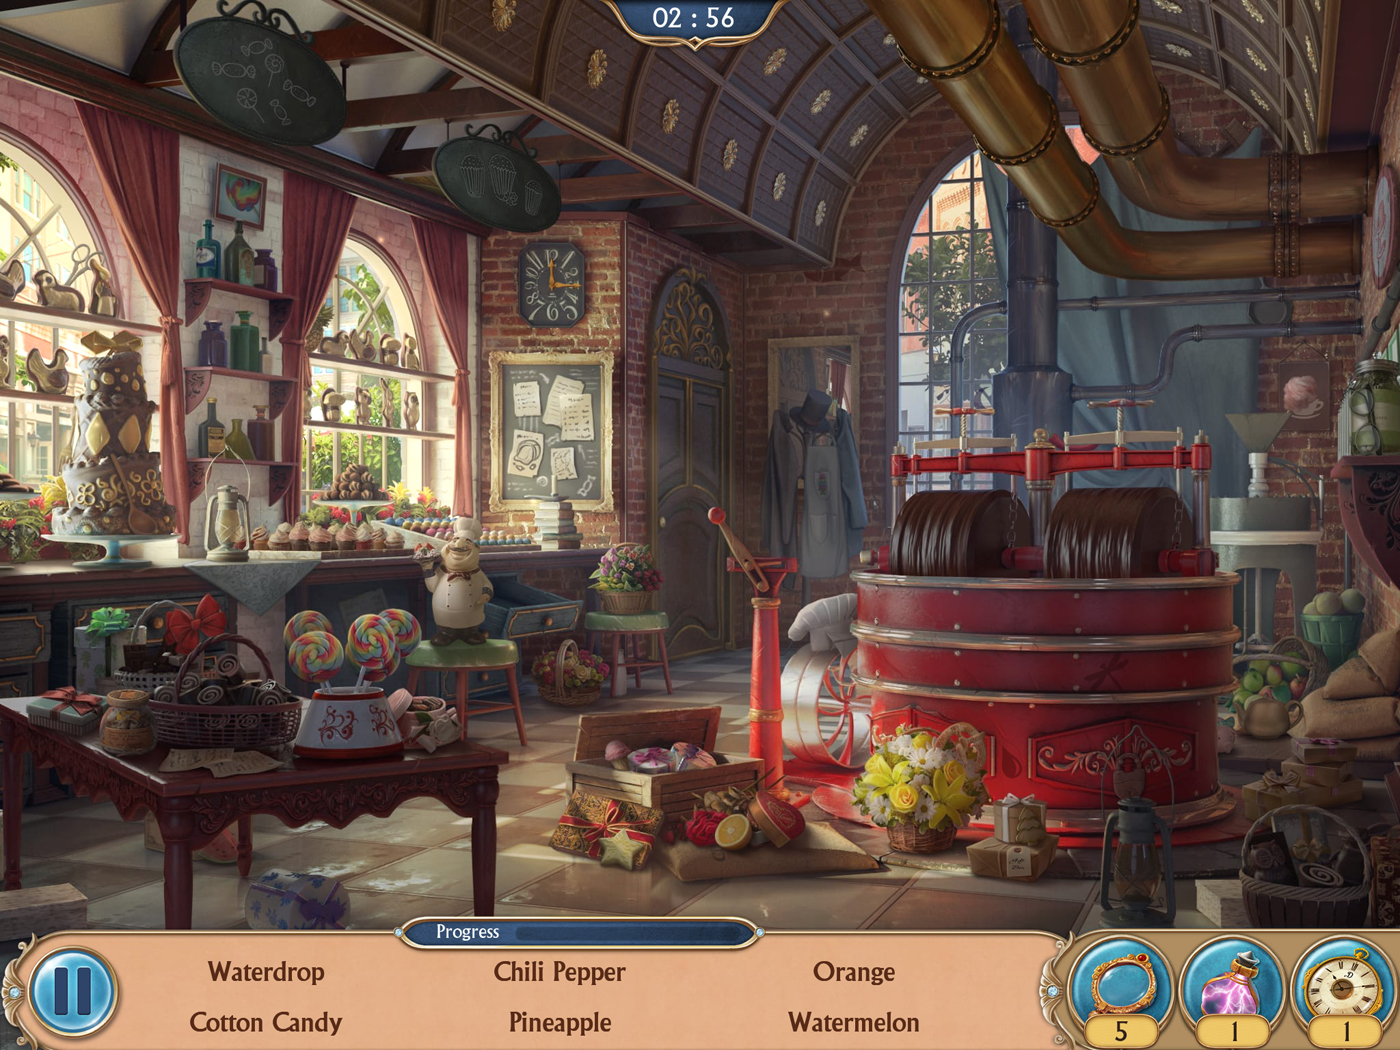
Location “Confectionery”
Our artists always strive for perfection, so the old locations are regularly updated. If the locations continued to be created according to the standards of 2015, it is unlikely that we would have achieved such a high level of quality. For example, the location “Clock Tower” three years ago looked completely different than it looks now.
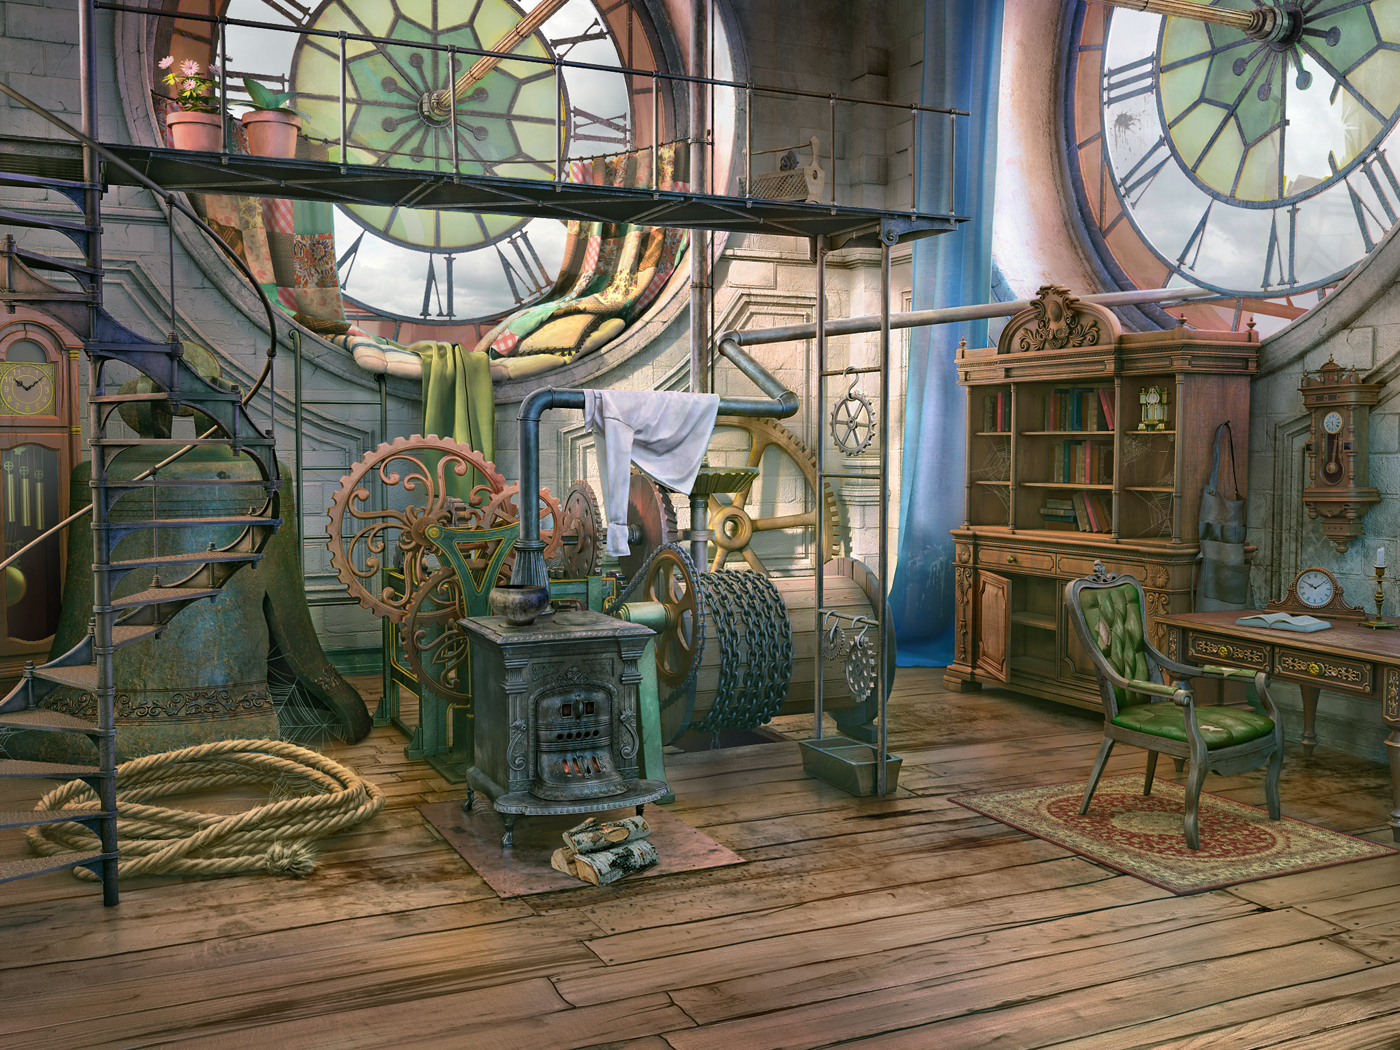
Location “Clock Tower” (2015)
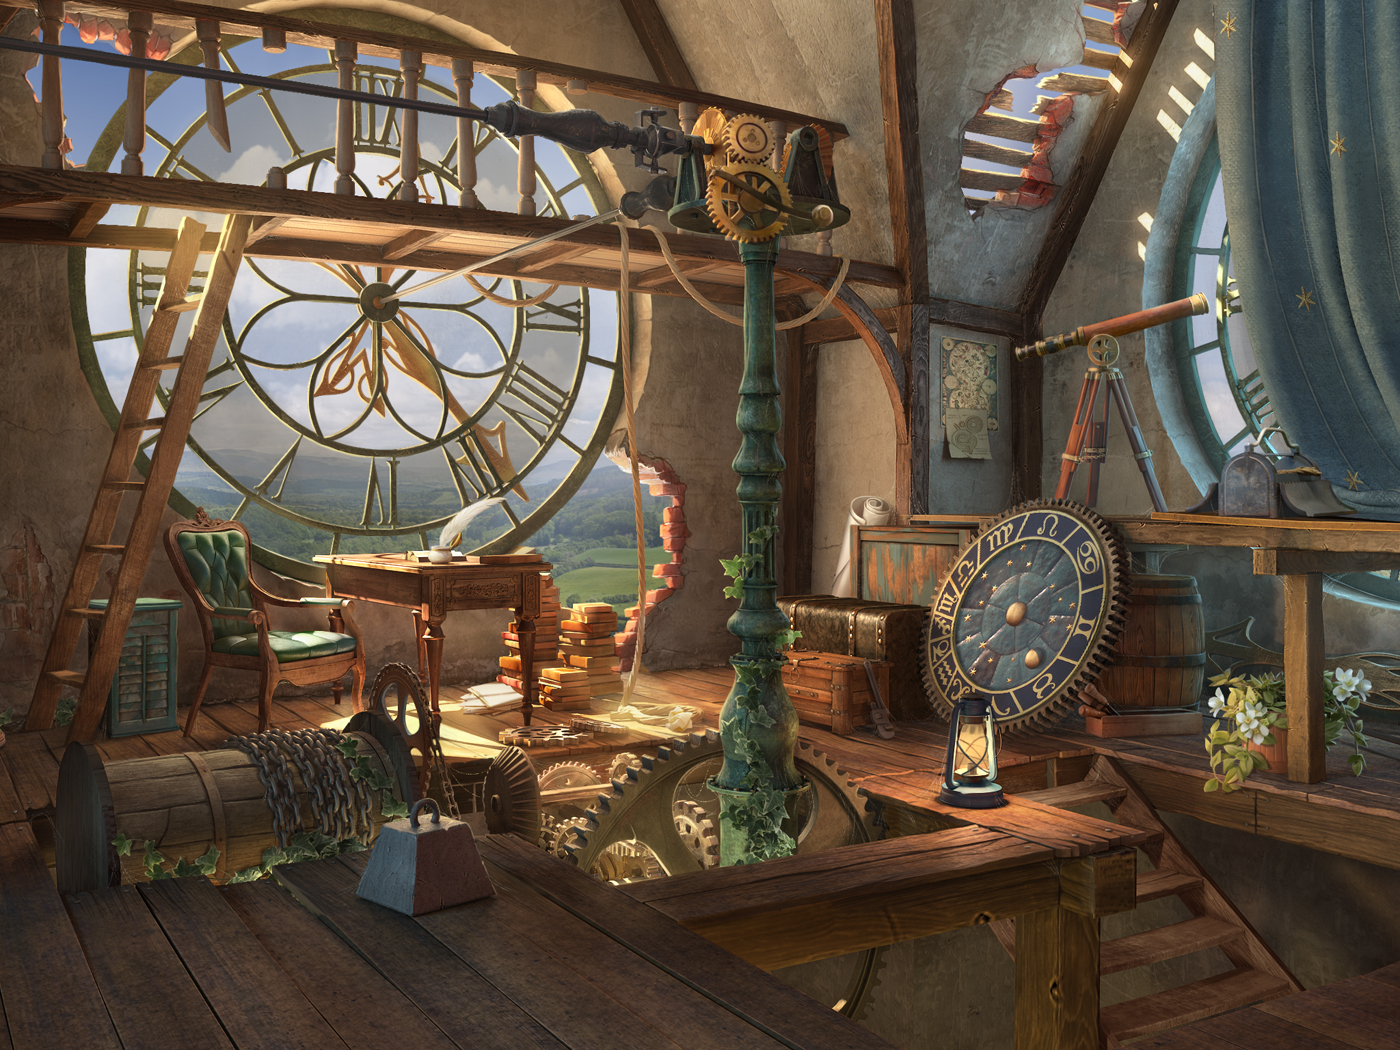
Location “Clock Tower” (2018)
Now you know how much work and effort the team put into each scene. And we continue to improve locations from update to update, making them even more attractive. At MyTona, we always strive to develop our skills and knowledge, look for new tools and programs, experiment with new plugins and scripts, and create our own technical solutions to improve and automate work.
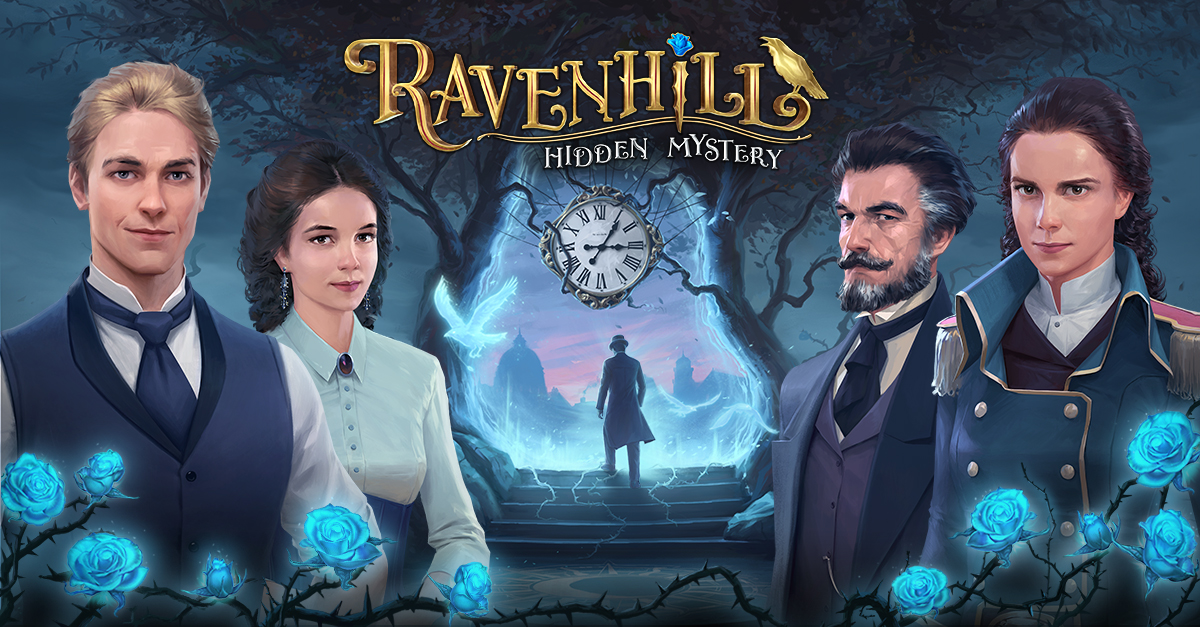
By the way, the global release of our new game — Ravenhill: Hidden Mystery has recently taken place. The game has absorbed all the best of Seekers Notes and we will definitely tell you about it in a separate publication.
Also on the topic: