Studio krem.productions shared the experience of creating a cinematic trailer for the game using Unreal Engine 4.

Rustam Ryaboy
We created our first cinematics on Unreal Engine 4 in the fall of 2018. It was a video for Steamcraft. It can be seen today on the project page on Steam.
Steamcraft Trailer
Using the engine for the trailer was not a sudden decision. Two circumstances pushed us to this.
The first is the imperfection of traditional instruments that are used today to create cinematics. Our usual pipeline is Blender, Cinema 4D and 3ds Max. The disadvantage of this bundle is a very long render. There is an alternative to this solution — a bundle of After Effects and the Element 3D plugin. With its help, it is possible to prepare videos much faster. But there is a problem. The package is unstable. Therefore, we were constantly in search of new solutions. We wanted the videos to be made both quickly and conveniently.
The second circumstance that led us to use Unreal Engine 4 is the hype around realtime visualization. In recent years, there has been more and more talk about the possibilities of rendering in real time, close in quality to cinema.
As a result, in the summer of 2018, I carefully looked at several cinematics made on Unreal and Unity, and decided that our studio should try to work with one of the engines.
It was on Unreal Engine 4 that we stopped because of the convenient built-in tools for creating cinematics, as well as the gorgeous Reflections Real-Time Ray Tracing Demo, which was shown last spring.
A little below is a story about how the video was being prepared approximately. But here it is important to understand that the sequence of events is a bit conditional. We did some things in parallel.
Animatic
I will skip such stages as writing the script and storyboards, but I will focus on the next one after them — the preparation of the animatic.
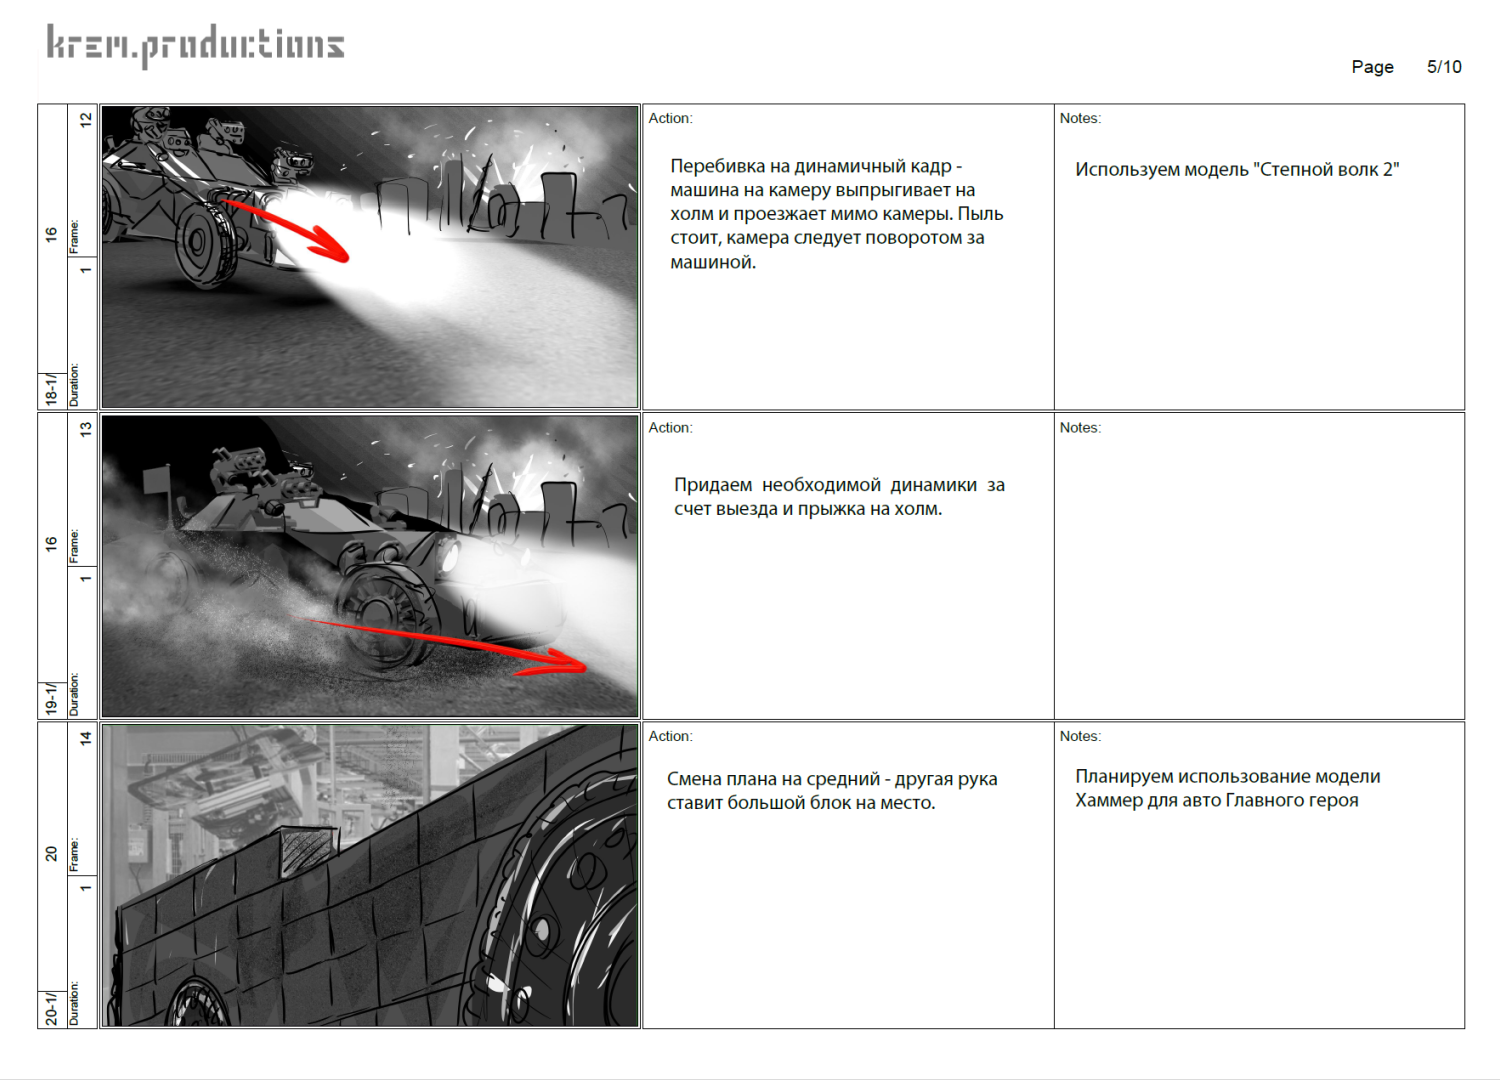
Storyboard of the video
An animatic is usually understood as an animated storyboard. In other words, a series of static images shown one after the other. In our case, the animatic was a rough sketch of the video made on the engine without using elaborate models and environments.
When we started creating animatics, we had no idea how animation works in Unreal. It took us a day to figure it out. I think this is a good proof of the low threshold of entry into Unreal for CG specialists.
Since each scene was rendered for only about two minutes, we could quickly make numerous changes. As a result, the fifth version of the animatic was adopted. This was the end of pre-production.
Stills from the animatic video
Preparation of models
We start the production of each video with the preparation of models and environments that will get into the frame.
The car models were prepared by our 3d specialists. As for me, I was responsible for the locations. According to the idea, there should have been four of them — a desert, a night forest, a winter forest and a garage.
Initially, I planned to create them myself. However, after getting acquainted with the editor of the engine materials, I realized that I did not have time to master it. For this reason, I, as befits a decent compose specialist, got into the Unreal Marketplace.
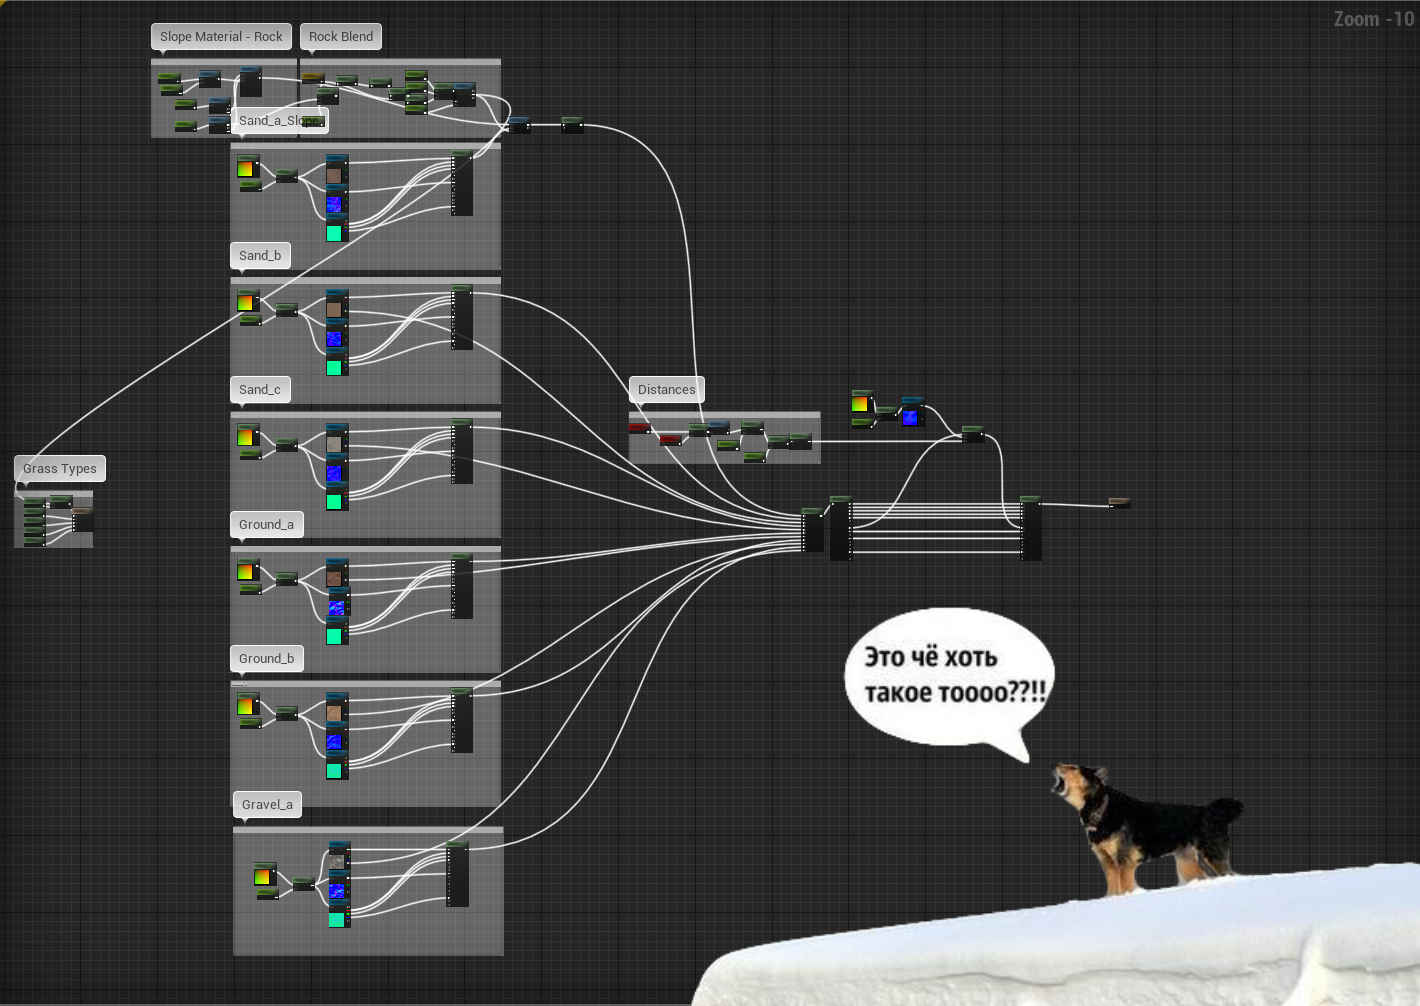
Unreal Engine 4 Content Editor
After just five minutes, I found a landscape package that had everything I needed. It remained only to fill empty locations with objects. And here the library of scanned objects Quixel Scan helped me.
Lighting Settings
After I managed to get my hands on Unreal Engine when working with assets, I paid attention to the lighting settings. In After Effects, I rarely worked with lamps, as it was very inconvenient. Everything is much simpler in Unreal, so there is an opportunity to experiment.
Importing animations
We decided that we would prepare part of the animation in Maya and 3ds Max, and then import it into Unreal. We knew that all animation should be done on bones, then there would be no problems. But it was not without bugs. For example, if two different animations with the same machine are in the same folder, then Unreal Engine throws errors and breaks the entire animation as a whole. This is treated by importing the animation into a new folder without any files.
Camera Animation
One of the most important advantages when working on videos in Unreal Engine is the ability to control the camera position using a standard WASD layout. There is no need to configure a large number of variables, just press a couple of keys.
Plus there is a wide customization functionality. You can even do post-processing right away. Since version 4.20, developers have introduced a new DoF method — Circle DoF, which gives wonderful bokeh. But again, not without artifacts.
Car animation
One of the most difficult stages was the creation of the animation of the car. It was necessary to make a universal rig of the car inside Unreal. After a couple of days, our 3d animators gave a cool and fully working result.
But as soon as we started recording the animation, something went wrong. Wheels flew off, disappeared, appeared, and sometimes guns stood up instead of wheels. We spent a week trying to sort out these bugs. The only explanation we found for their appearance was as follows:

The deadline was approaching, and the scenes with moving cars were not ready. Cars moved through the air, through the ground, sometimes without wheels.
As a result, in order not to waste precious time, in a number of scenes it was necessary to go to various tricks so that everything looked good on camera, even if it was about flying machine guns.
Finish line
Since I was responsible for the final result, I had to take over the color correction with editing. For these tasks, I used After Effects. But it could also be done in Unreal Engine. All the necessary tools are there.
There were no problems with color correction. However, at the stage of installation, it became clear that there was not enough dynamics. So I decided to add a few more scenes, and in some of the available ones, change the camera angle and movement.
These changes took the last two days of work before we sent the first version of the trailer to the client. After a few edits, it was accepted.
Epilogue
A very important point for which I fell in love with Unreal with all my heart is iterativity. When you immediately see the end result in the window, and the rendering of a minute-long video takes 20-30 minutes, then time for creativity and experiments is freed up.
We reshot some scenes 5-10 times, we shot a few scenes just in case. We could make mistakes and at the same time not waste time on rendering, as we saw the result close to the final in real time.
The idea to change the usual pipeline from Blender, 3ds Max, Maya to Unreal Engine right before the start of the project seemed crazy. But we succeeded. So now Unreal has become one of the tools for rendering videos for us.